Monday, December 29, 2008

Art Lessons for All Ages - Learning from the Masters - Collage and James Rosenquist

On the short list of my New Years' to-do list is to clean out my studio! (Of course right above that item is "make new work"! ) As I was straightening the studio up a little, I came accross several projects I created while teaching various classes to students of all ages - from 4 to 80! I often drew inspiration from famous artists, and adapted their styles and techniques for whatever age group I was working with.

Most of these lessons can be adapted for any age group - elementary, middle or high school, even college and adult art classes - it depends on how much of the background you want to delve into - just the idea, how it was created, or to dig deeper into the artist's intentions and the art historical context in which it was originally made.

I will post several of these projects, and give you a few major points to consider if you want to utilize the project idea for yourself, or incorporate it into your own lesson plan! These are by no means fully fleshed out projects - just an idea that I want to share!
Inspired by James Rosenquist
James Rosenquist is an incredibly accessible and inspirational modern artist and a wonderful artist to look to for an interesting technique.
In an excerpt from "Modern Art" by Hunter and Jacobus... "Rosenquist...summarizes with epic grandeur America's taste for objects, material progress, and social optimism". Rosenquist painted these billboard-sized paintings that were composed of images taken directly from mass produced magazines and newspapers. The images to the left show a compositional study and an actual painting.
While your students may not get to paint on the same monumental scale of Rosenquist, they can still incorporate the technique of collaging images taken from multiple sources such as newspapers or magazines, and combining them in an interesting composition.
Encourage your students to consider elements of design, but also to move beyond just copying the collage that they create - perhaps change scale or color, play with layering and filling in negative spaces with inventive techniques.
If you want to take it to another level, students can develop an interesting narrative to accompany their images.
These are just a few suggestions to get you started - if you are interested in taking the idea further, I suggest looking into the following points-
James Rosenquist (especially his background as a billboard painter)
American Pop Art
Photorealism
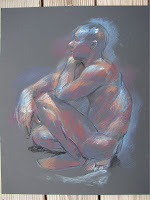
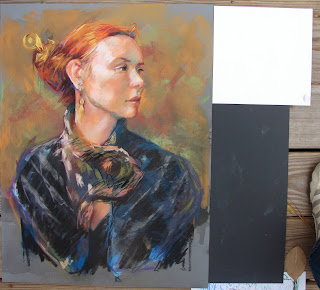
The last two images are a collage that I created and the painting that followed.


Thursday, December 11, 2008

Figure Drawing - Mike Drawing in the Sand

I was able to draw from the live model last night for the first time in a couple of weeks...man I really miss it when I don't go at least once a week! I think it's fair to say I'm addicted to drawing from the live model!

And of course last night was a wonderful drawing session because Mike was on the stand. This is the long pose from our drawing session. Shane recommended something "compact" - which I love (Mike IS the "human pretzel")

Staging the pose is very important. When working with a large group, goal number one should be to provide an interesting pose from all angles.

This pose was reworked a bit as we all surveyed it from our different vantage points. The outstretched arm was repositioned several times, and we settled on this suggestion from Shane that he called "drawing in the sand". What's nice about the outstretched arm was the "nook" it created behind it where mike's legs were tucked underneath. From the other angles, it added a nice negative shape to an otherwise compact pose.

Plus it played up Mike's structure in his arm and back - the lighting and the pose came together and we had a wonderful night of drawing.

Well we've had 48 hours of rain here in Woodstock, GA so getting a phot of the drawing in natural light is not happening. So I was trying to get a good picture of this drawing indoors...which is hard because the lighting is difficult, but also because every time Ari sees the camera she runs over and says "Cheese!"

So...here's my little peanut and the drawing!

Thursday, December 4, 2008

SOLD - Some recent sales...


Sent out two more original drawings this week! They are both gifts so SHHHHH if you know who's getting them!

I get so thrilled to hear that someone likes my work. I think it's an even greater compliment to know that they are confident enough in the purchase to give it as a gift! I am truly honored when I hear that my work is a gift to someone else.

Saturday, November 29, 2008

Setting Up the Christmas Tree

This was earlier that afternoon...watching a show in the play room.


I love this time of year! Decorating the house...inside and out! We were lucky enought to have some gorgeous, sunny weather here in Woodstock yesterday and I got almost all the outside decorating done.

The kiddos helped me with the tree...and I use that term loosely. Pretty much a one-to-one ratio for a while...I got an ornament on, Ari took one down. But it was fun!

Monday, November 24, 2008

Portrait Drawing Techniques...Pastel 2


The quest to conquer pastel portraits continues! I found an amazing product image in a fellow Etsian's shop and she gave me permission to use this gorgeous product photo.
This practice portrait is on grey mat board, so it is a very smooth surface. I liked working on the medium grey - one of my favorite colors - because I can use lighter and darker colors on the surface - and with the beautiful bright light that is so crucial to the feel of this photo, I wanted to be able to emphasize that glow - I don't think a white background would have been as successful.
Anyway...I still feel like I am getting to know my pastels - each one - whether is is a hard Nupastel or a regular soft pastel - has such a different texture and feel to it. Some are very dense and don't lay on a lot of colors, others are so soft you can hardly control how much layers on the page.
I am learning more about succesful layering - this time I started much lighter with my sketch, so I didn't feel like I was fighting my initial sketch thru the whole drawing. I love when two very different colors work so well in layers - a cranberry under a sap green gives a beautiful glow to the shadowy side of the face.
Anyway...I am enjoying the challenge and LOVING the hunt for inspiration photos on Etsy!


This fabulous photo and scarf is from http://bymariannes.etsy.com/. Thank you for the inspiration!
Oh...and I wasn't alone in my studio today...Jack was hard at work on a watercolor!

Saturday, November 22, 2008

SOLD! Saying good-bye to some favorites

It's that bittersweet time again...thrilled to have made some nice sales, sad to see some of my favorites go! Excited to send them out in the world, wishing I could look at them a little longer!

I keep reciting what my undergraduate teacher used to say "If you are afraid to sell something, you're really afraid you will never make anything better".

So...I hope these drawings are happy in their new homes in Seattle and Toronto! As for me, I will keep working.


Thursday, November 20, 2008

Painting Techniques...Choosing a Palette


I have had this still life in my studio for several months - the result of a live model session where the model had to go home sick and we made do!

But it hadn't developed any further than the initial sketch...I didn't knw what direction i wanted to take it in, and i was a little worried about layering over the drawing because i liked a lot of the line qualitly in the drawing.

But I was inspired by a photograph in my latest Entertainment Weekly of the band Coldplay


(BUY their latest album if you haven't - every track is awesome!)

The photo is actually built (I think) like a great painting - the colors (umber with cobalt blue and cadmium red moments) Great linear and geometric elements and a wonderful variety of textures.

So...I used the pallete for my still life! I made sure to spray the charcoal drawing and my initial layers of paint were mixed with glaze so that the lines were preserved.


After adding a bit more paint, I went back with my charcoal pencil and re-discovered a few lines that I wanted to emphasize.

It's not done yet...but i feel much better now that I've got this painting started!


You never know what will inspire you.

Monday, November 17, 2008

Techniques - Taking Photos of your Art


Ok...I don't know if this is a lesson learned or forgotten and then re-learned, but I know a lot of my fellow artists need to take great photos of their work and I want to share a tip I discovered while taking photographs a couple of weeks ago.

I often have pictures/drawings that are pretty monochromatic - like the drawing of James on the black board. On the left is a photo I took of that drawing by itself.

And then on the right there is a photo I took with another picture next to it - a picture on a white background.

The colors and depth in James' drawing really improved because the camera was reading a broader value range.

I Incorporated this discovery into taking the picture of the pastel portrait - setting a piece of black and a piece of white mat board next to the drawing - and the value range of the portrait was much better.

I like to take my photos in bright but indirect sunlight - you can see my son lining up his art with mine to take pictures (he works right next to me in the studio...so of course his work needs to be photographed, too!)http://krystyna81.blogspot.com/2008/08/artistrya-hereditary-talent_04.html


I hope this helps for anyone taking pictures of 2D art...try to give your camera a full range of value to read, and your pictures will improve!

Wednesday, November 12, 2008

Portrait Drawing Techniques...Pastel


There is a lot of great artwork and hand-made beauty on the net....and sometimes I am struck by a gorgeous picture and can't get it out of my head! I saw this knit shop on the front page of Etsy and e-mailed the owners, asking for permission to use their images for inspiration. I rarely see such gorgeous product pictures. I love the pose, the color, the shape of the scarf...beautiful!

I don't do a lot of pastel portraits. I draw from the live model quite often using pastels and charcoal - but they have few layers of pastel - they are very immediate. So this was a learning process for me.

I was working on a pre-made grey pastel board, one that has a similar texture to a very fine sandpaper. I loved the grey and the way the oranges in the drawing looked against it. But I did some things wrong - I did my initial drawing with a very deep red nupastel, and I was battling (trying to cover) those lines for the rest of the drawing.

I love layering blues, greens and purples in skin tones - but I forgot that at some point the pastel becomes "saturated" and I can't draw on top of it any more! I did spray fix and sand away some areas hoping to recapture some texture and allow more layers, but I wasn't successful.

O well...the overall impact is pretty good, and I loved giving it a try, and I'm inspired to try another drawing! Thank you so much for inspiring me!

http://www.ellita.etsy.com/ Gorgeous shop!!!!

Friday, November 7, 2008

Figure Drawing Techniques...Black on Black

I have posted several drawings on grey background (I usually use a medium grey mat board) but this is the first I have done on a black background. I love drawing James - he has a great figure, and his poses range from incredible dramatic to subtly beautiful. I had scheduled him for our modeling session last night, and I knew that it would be a great challenge to start on a very dark background and just bring out the highlights on his skin.

This was an awesome pose for this challenge - the lighting was creating excellent shadows, and because his head is shaved it really allowed for a clean, masculine look to the drawing.

His deep brown skin creates a huge array of colors in the highlights and shadows - ranging from icy blue highlights to red-umber reflective light.

It was a challenge working on the black surface -I had to be careful not to get too chalky with my colors, and some of the deeper richer colors were losing their impact on the black.

But overall I am very pleased!

James also did this curvy back pose for us - the ess in the spine and that very unique shadow on the back were challenging to draw. I switched to warmer tones for this drawing.

The last drawing is Diane from our Wednesday night class at Shane's studio. It's watercolor pencil on watercolor paper mounted to foam core. I like the colors and the pose and I feel like I created a strong sense of where the light source was coming from, but next time I think I'll start with my warm colors and work towards cool...here I did the opposite and never quite warmed up her skin tone.


O well...that's why I continue to draw from the live model - always something new to learn!


Monday, November 3, 2008

Artistic Talent... A Hereditary Trait


I strongly believe that my artistic talent was inherited from my mother's side of the family - her Aunt (my great aunt Barbara Bieniulis) was an amazing artist, as was her father (my great grandfather Zygmunt Bieniulis).

The portrait on the left is by my Aunt Barbara, probably at least 35-40 years ago in Warsaw, Poland. I just received it this year from my Grandfather's estate - I had never seen it before. The portrait on the right I created in 2003.

I am shocked at the line quality, the characteristics of the eyes, the attitude in the neck, the treatment of the nose...they are all so similar! One eyebrow is straight, the other is curved...

I am in awe of the similarities. I am feeling so grateful that I inherited her incredible talent. I hope I can do her justice!

SOLD...good-bye beautiful!


Said a heart-felt good-bye to a lovely drawing. This charcoal portrait of Katherine posing nude with a drapery sold a couple weeks ago. I'm so glad she has found a new home, but I will truly miss this piece.

Figure Drawings...Catching Up

I have been neglecting my updates from my figure drawing classes!

The top drawing is Tina from two Thursdays ago here in Woodstock...there's something about Tina's creamy skin that shows so much variety of the light - I tend to grab lots of fuscias, pinks and blues when I draw her...the range of warm to cool light shows up so well on her skintone.

The next two were drawn at Shane's studio last Wednesday night. This model was new to me...I think her name was Maureen (don't hold me to that!) but she was a lovely model, and I'm so glad I had time to draw the pose from two different vantage points.

The light background was done first - broadly laying in areas of color and then defining those areas with charcoal line.

The second drawing was a bit more dramatic - I was standing in a darker corner of the room, behind the light source that was shining on the model, so I could really play up the light and shadow accross her form.

I've decided most of my work looks vbest from about 10 feet back...every time I backed up to look at my drawing I liked it better than up close!

Don't forget...buy anything in my Etsy shop now until Nov 15th and recieve a free print of your choice!


Sunday, November 2, 2008

Painting Update...off with her head?


Ok so now I am at the point in this painting where I have to pace myself...don't over-do-it. Don't lose the quality of the line that you like. Don't muddy it up. Edit.


My biggest decision is whether or not to cut off the top row (it is on watercolor paper mounted to foam core, so it would be easy to cut on my mat cutter)


I think it works better as a square format. The top row is too disconnected, and I also think the figure facing the viewer changes the feel of the piece - the views from behind seem to be working better.


Anyway, I think it's inevitable...off with her head!


And this may be why I'm focusing on orange and blue lately - look at the beautiful leaves against the clear blue sky!


I did this forest painting a few years back that was also inspired by this time of year - very similar pallette.


PS - don't forget - all purchases in my Etsy shop come with a FREE PRINT of your choice!

Saturday, November 1, 2008

Scorpio Celebration!

OK...I'm a Scorpio...my birthday is on the 21st (and so is the hubby...he's on the 9th!). And to put some "good scorpio karma" out into the universe...

Buy anything in my Etsy shop and recieve a FREE 8x10 print of your choice!

Just click on the Post Title...

Friday, October 31, 2008

The Pumpkin Carving Lesson...less is more

Ah...the pumpkin carving. The buying of the perfect pumpkin.
The anticipation of creating a masterpiece of this odd orange vegetable.
The loss of confidence as you start to carve, realizing you have neither the time, patience, or desire to cut out 72 little tiny pumpkin sections from a 3 inch thick rind to create the ultimate spider web image, complete with an eight legged spider.
The joy at watching your three year old draw one eye, nose and mouth on his pumpkin.
The realization that three holes are easier than 72.
The elation at being able to use a real kitchen knife instead of those little miniature hack-saws that come with the pumpkin carving kit.
The best pumpkins I have ever seen.

Thursday, October 30, 2008

Painting Update

OK - worked without Jack in my way! Thanks David for taking Jack away for a little while...

I'm mellowing out a few of the squares - layering some more neutral browns or changing some of the more intense blues to more greyish blues. I think it's looking much better!

I'm posting a big influence on this piece - a painting by Kim Frohsin (http://www.kimfrohsin.com/) that I tore out of a magazine a couple years ago (I think!!!) It's been hanging in my studio forever. I love her use of color, line, paint quality, the variety she achieves in her piece while still maintaining unity among the squares.


This is a corner of my studio - covered by naked ladies - but

showing a drawing from way back in 2003 - the purple and black of drawing of a torso - where I also did a first layer of squares before drawing on top. I'm glad I had that drawing on the wall, too...I like the variety of drawing techniques I used. I need to keep that in mind! There's a different feel to a painting from a live model - an energy an immediacy - you can't always achieve when working in the studio from memory.

Click on any picture to see detail.


Tuesday, October 28, 2008

Painting Update...mine and Jack's


Well I finally got to work for a short while today - and I use that term loosely because I had a three year old monkey boy climbing on top of me, asking for paint, wanting to peel dry paint off my old pallette (OK who doesn't love to do that?) and dropping my favorite blue Nupastel on the floor and breaking it into a zillion pieces.
Urgh.
O well...I did get some things accomplished, and I like some of the small sections individually, now I need to make the whole thing work together.
It wasn't a total loss in the studio today...at least Jack made a good painting!